
12 DIY Headboard Ideas on a Budget
Your bed is the biggest piece of furniture in your bedroom, so the wall behind it sets the tone for the entire room. A great headboard can make even a simple mattress-and-frame setup feel finished and cozy — but store-bought headboards can easily run into the hundreds of dollars, and the mass-produced ones often look like every other bedroom on the internet. The good news is that some of the most charming headboards are the ones you make yourself, often for the cost of a weekend and a handful of basic supplies. Whether you love rustic texture, clean modern lines, soft upholstered comfort, or boho warmth, there's a weekend project here with your name on it. These 12 DIY headboard ideas are all budget-friendly, beginner-achievable, and completely customizable to your space. Grab your tools (or just your glue gun), and let's turn that blank wall into the prettiest spot in the house.
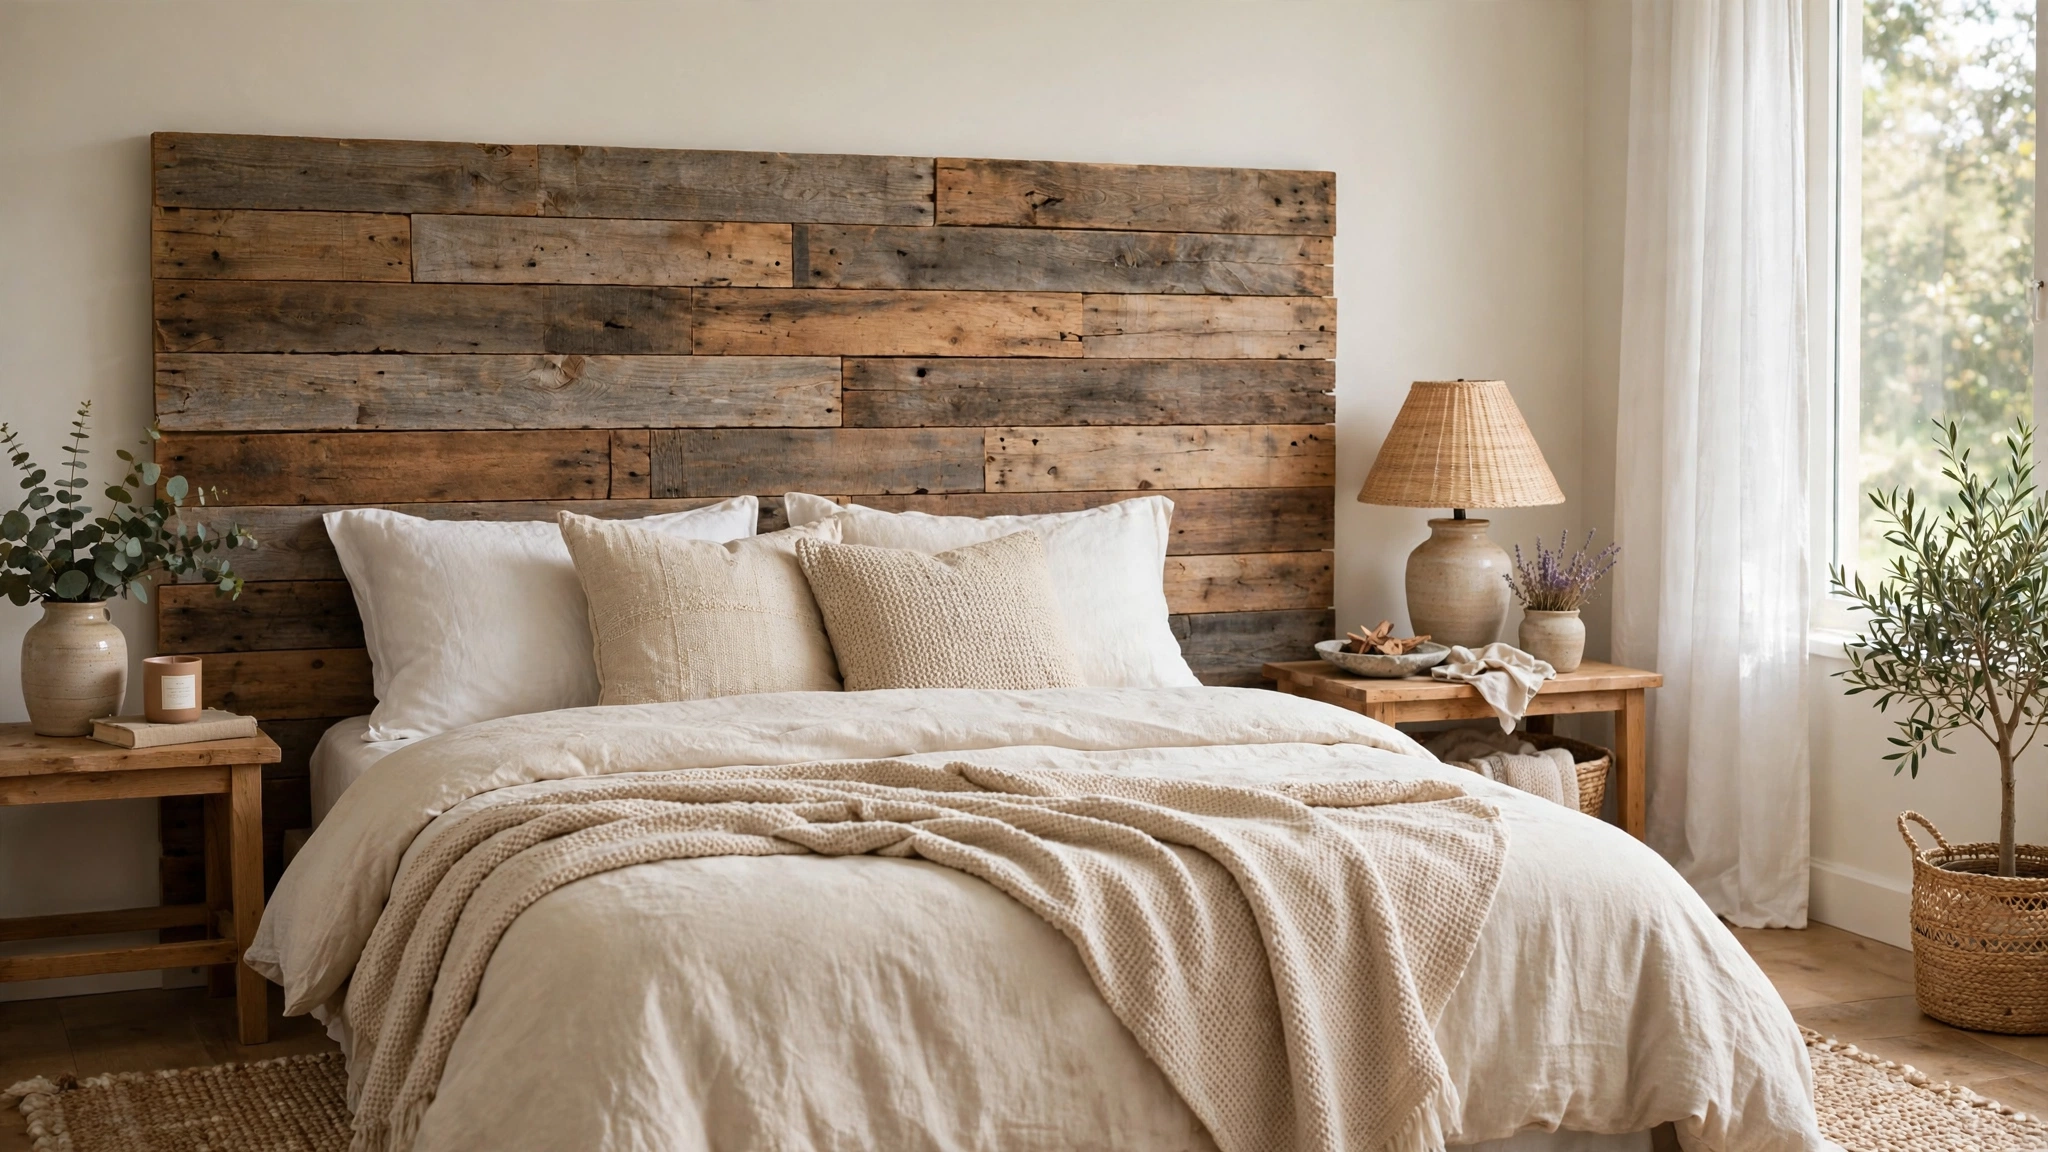
1. Reclaimed Wood Plank Headboard
Few things feel as cozy as a wall of warm wood behind your pillows. For this classic project, you'll need fence pickets, pallet boards, or inexpensive pine planks from the lumber aisle — about six to eight boards for a queen-size bed. Start by measuring the width of your bed and cutting your boards to length, adding a few inches on each side for a generous look. Sand each board lightly to remove splinters, then lay them face-down and screw two horizontal support battens across the back to hold everything together. This is where the fun starts: stain, whitewash, or paint your planks in any finish you love. A weathered gray whitewash gives cottage charm, while a deep walnut stain feels modern and moody. Lean the finished panel against the wall behind your bed or bolt it directly to the bed frame for extra sturdiness. Style it with crisp white bedding and a chunky knit throw so the wood grain becomes the star. Difficulty: easy — just a saw, sander, and drill.
2. Fabric-Covered Plywood Panel
If you love the look of an upholstered headboard but not the price tag, this is your project. Start with a sheet of half-inch plywood cut to your bed's width and your desired height — most people go 24 to 30 inches tall above the mattress. Wrap the plywood in a layer of inexpensive quilt batting or thin foam to give it a soft, padded feel, stapling it snugly around the back with a staple gun. Then stretch your chosen fabric over the front and staple it on the back, pulling firmly as you go and mitering the corners like a gift wrap for a clean finish. Linen-look cotton, ticking stripe, or even a thrifted tablecloth works beautifully. For a designer touch, add nailhead trim around the edge using a nailhead trim kit — it's shockingly easy and looks expensive. Mount the panel to the wall with French cleats or simply rest it between the bed and the wall. Style with layered pillows in mixed textures to play up the softness.
3. Tufted Button Headboard (The Easy Way)
Real tufting looks like it requires an upholstery degree, but there's a shortcut that delivers the same plush, diamond-tufted look with a fraction of the work. Build your base the same way as the fabric-covered panel above — plywood, foam, fabric — but mark a grid of dots on the fabric front before you start stapling. At each dot, push a needle threaded with strong upholstery thread through the fabric, foam, and plywood, then secure a covered button on the front and knot tightly on the back so the button pulls the fabric into a dimple. A drill helps here: pre-drill tiny holes through the plywood at each grid point so the needle passes through easily. Space the buttons about six inches apart for a classic diamond pattern or eight inches for a relaxed look. Cover your buttons in matching fabric with an inexpensive button-covering kit, or use contrasting velvet buttons for drama. The result is a boutique-hotel headboard for under the cost of a pizza night. Difficulty: moderate, mostly patience.
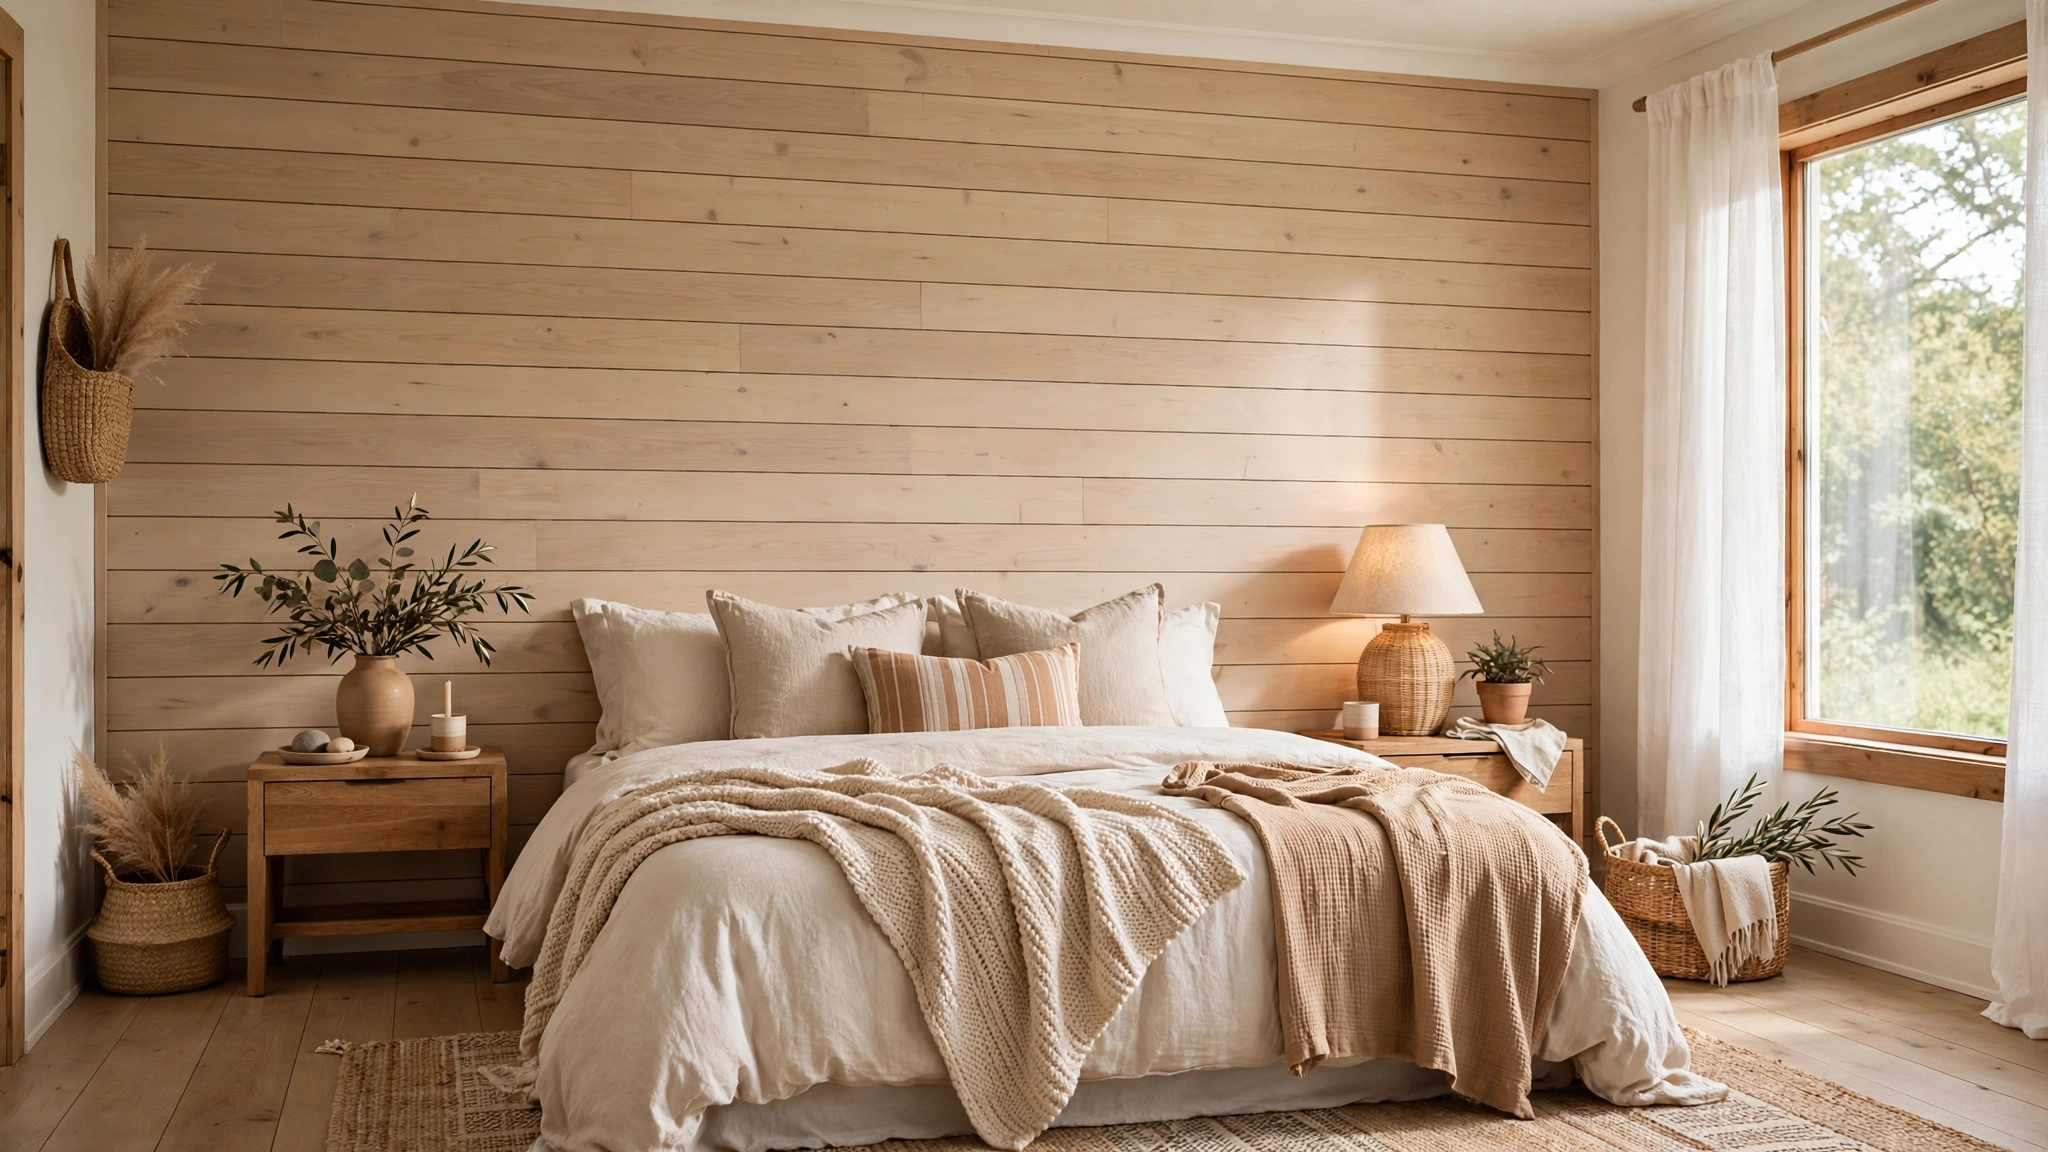
4. Shiplap Accent Wall Headboard
Instead of building a standalone headboard, let the whole wall behind your bed do the talking. Peel-and-stick shiplap planks or thin plywood strips give you that cozy farmhouse texture without any heavy carpentry. Measure the wall behind your bed and plan your planks to run horizontally from floor to ceiling — or just go two-thirds up the wall for a half-wall effect that's even quicker. The key to a professional look is starting level: use a laser level or a simple line level to draw your first line, then work upward, staggering the joints like brickwork. Fill nail holes with wood filler, caulk the edges where the planks meet the ceiling and baseboards, then paint everything in one cohesive color. Soft white feels fresh and airy, while a sage green or dusty blue makes the bedroom feel like a retreat. Hang a pair of sconces or framed art directly on the shiplap for a layered, styled finish. Difficulty: easy to moderate.
5. Macramé Wall Hanging Headboard
For a boho bedroom with zero power tools, a large macramé wall hanging is pure magic above the bed. You can buy a ready-made piece from a craft market, but making your own from cotton cord is far cheaper and deeply satisfying. All you need is a wooden dowel or a found branch, several hundred feet of 3mm cotton cord, and a free afternoon to learn two basic knots: the lark's head (to attach cords to the dowel) and the square knot (which forms almost every pattern). Hang the dowel on two wall hooks centered above your bed, then work your design downward — geometric V-shapes, layered fringe, and alternating knot rows all look stunning. The real trick is leaving long fringe at the bottom and trimming it into a V or straight edge for that finished artisan look. Style it over warm white bedding with terracotta and cream throw pillows. This headboard is feather-light, renter-friendly, and costs mostly in cord — one of the cheapest projects on this list.
6. Painted Arch Headboard
Sometimes the boldest headboard isn't a headboard at all — it's paint. A painted arch directly on the wall behind your bed creates instant architecture and costs less than a can of paint. Choose a color that contrasts with your walls: terracotta, deep forest green, dusty rose, or charcoal all work beautifully. Measure the center of your bed and mark the wall, then decide your arch width (bed width plus a few inches) and height (about 48 to 60 inches tall). Create your arch by tying a string to a pencil, anchoring it at the arch's center point, and swinging a perfect half-circle, then dropping straight lines down to your base line. Paint two coats with a small roller, cutting in the edges carefully with an angled brush — or use painter's tape along the straight edges for crisp lines. The arch grounds your bed like a real headboard and photographs beautifully. Layer your actual pillows against it and add a pair of bedside tables that sit inside the arch's width. Difficulty: easy, if you can trace and paint.
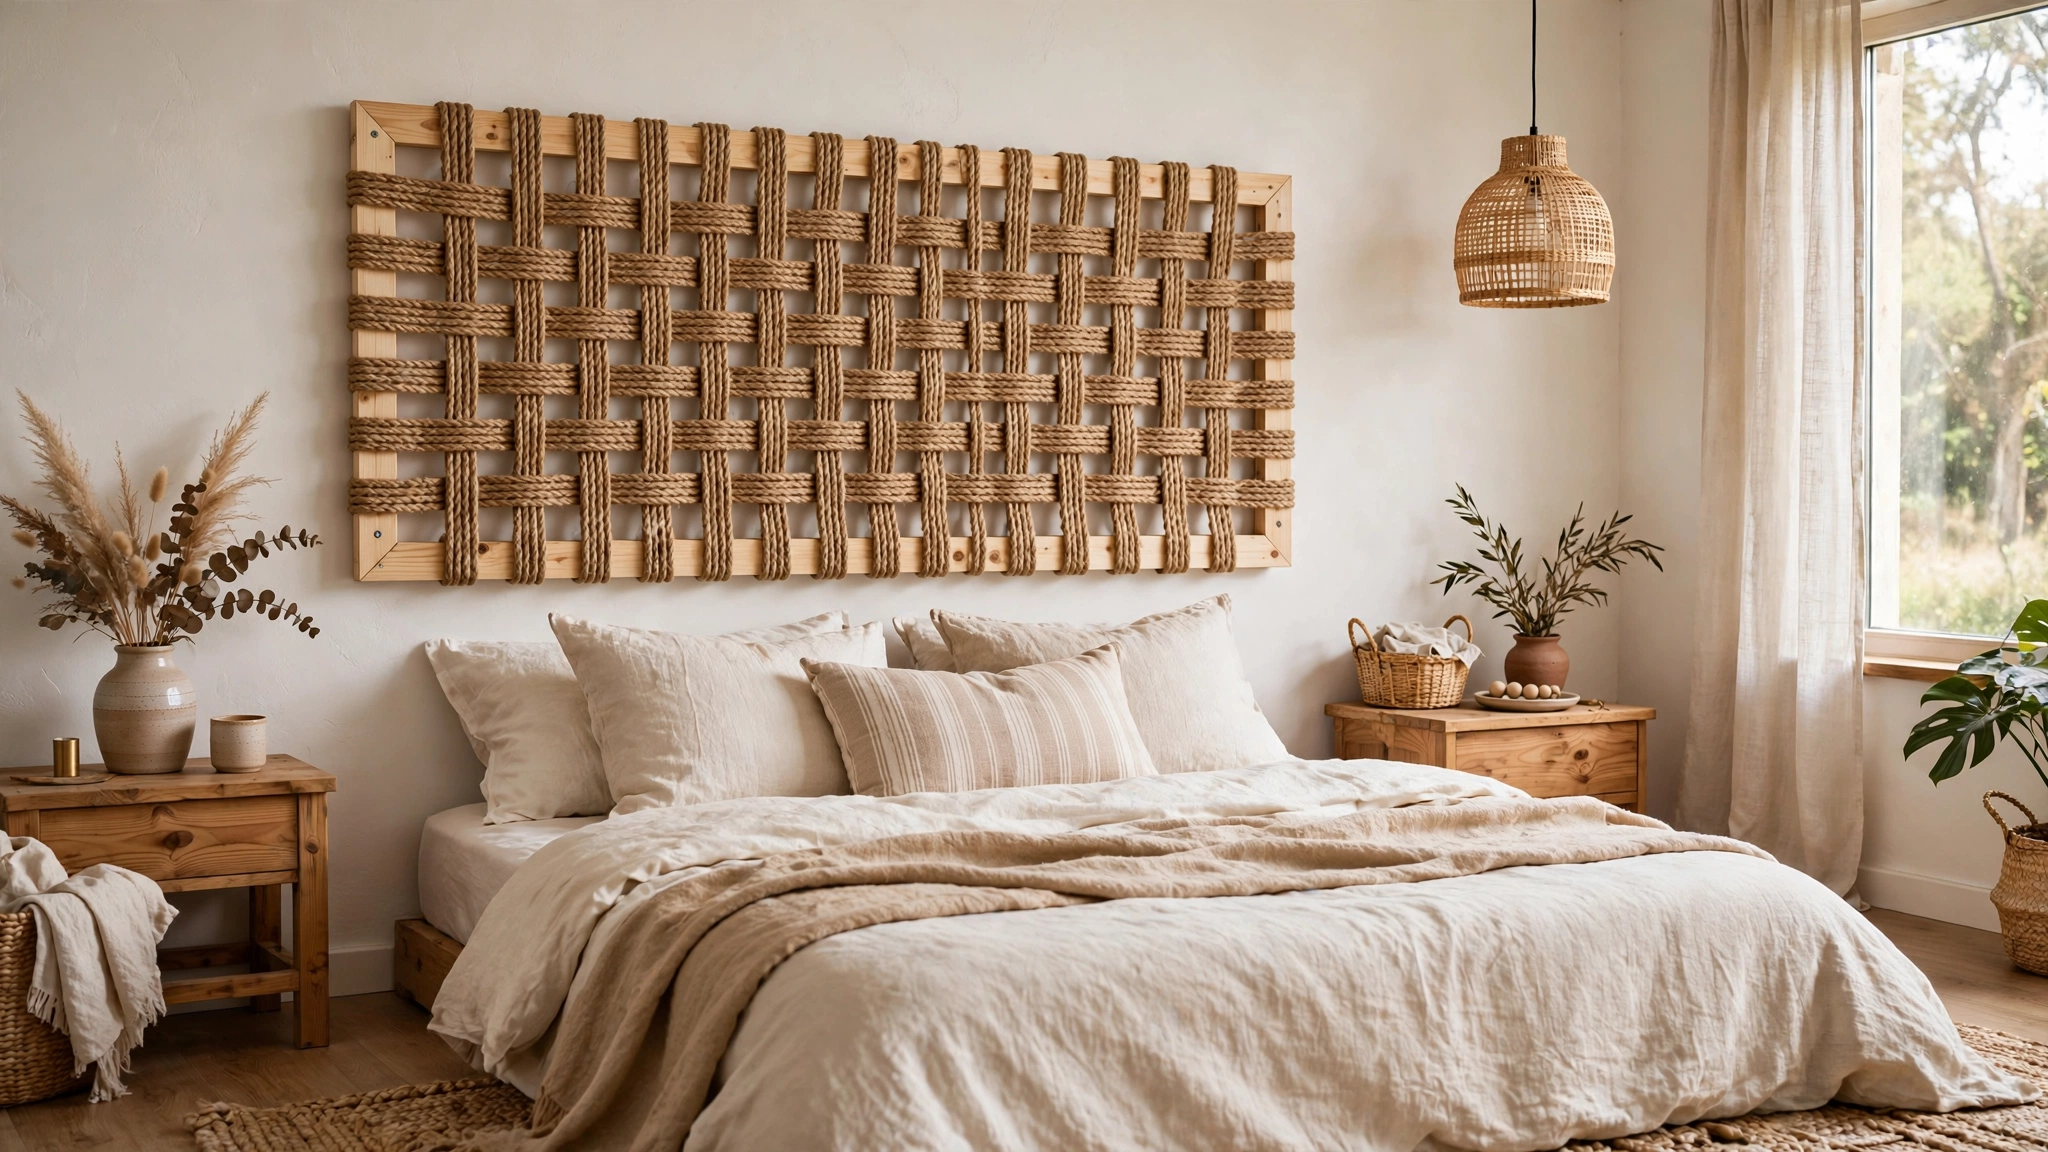
7. Woven Jute and Rope Headboard
Natural fibers bring instant warmth and texture, and a jute rope headboard is one of the easiest builds here. The simplest version: take a wooden frame made from inexpensive pine 1x2s screwed into a rectangle, then weave thick jute rope or sisal cord back and forth between the top and bottom rails like a loom. Keep the wraps snug and even, and secure each row with a dab of hot glue on the back rail so nothing slips. For a variation, stretch the rope horizontally instead, or weave it in an over-under pattern through vertical cords for a basket-weave effect. Another no-build option: hang a large woven jute rug or a set of round woven placemats in a grid directly on the wall behind the bed. The natural tan tones pair gorgeously with white bedding, rattan furniture, and leafy plants. Everything here is lightweight and damage-free to hang, making this a favorite for renters who want texture without commitment.
8. Bookshelf Headboard with Storage
Small bedroom? Make your headboard work double duty. A low, wide bookshelf placed horizontally behind the bed gives you a headboard, a nightstand, and book storage in one piece. Look for a sturdy cube-style shelf unit or build a simple open box from pine boards — about 12 inches deep so it doesn't crowd the bed. Sand and paint it to match your room, then secure it to the wall with anti-tip straps (this is important — a toppling shelf behind a bed is a real hazard). Style the cubbies with a mix of books, small plants, a clock, and a couple of framed photos, leaving some empty space so it doesn't look cluttered. Top the shelf with a row of lean-against art or a trailing pothos plant for softness. If you read in bed, add a clip-on reading light to the top. This project costs little more than a budget shelf unit and solves the eternal problem of nowhere to put your book and water glass.
9. Vintage Door or Shutter Headboard
Architectural salvage is a treasure hunt, and an old door makes one of the most characterful headboards you'll ever own. Check salvage yards, flea markets, and online marketplaces for a solid wood door or a pair of tall shutters — they often cost very little because sellers just want them gone. Clean the piece thoroughly, sand lightly, and seal it with clear wax or polyurethane to lock in the chippy paint (never sand old paint aggressively, as vintage pieces can carry lead paint — seal rather than strip). A single door works for a twin or full bed; for a queen or king, mount two doors or a pair of shutters side by side. Attach the piece to the wall with sturdy picture-hanging hardware rated for its weight, or bolt it to the bed frame. The peeling paint, old hardware, and panel details give your bedroom instant history. Style with simple linen bedding so the door stays the focal point, and add a cozy throw in a color pulled from the paint.
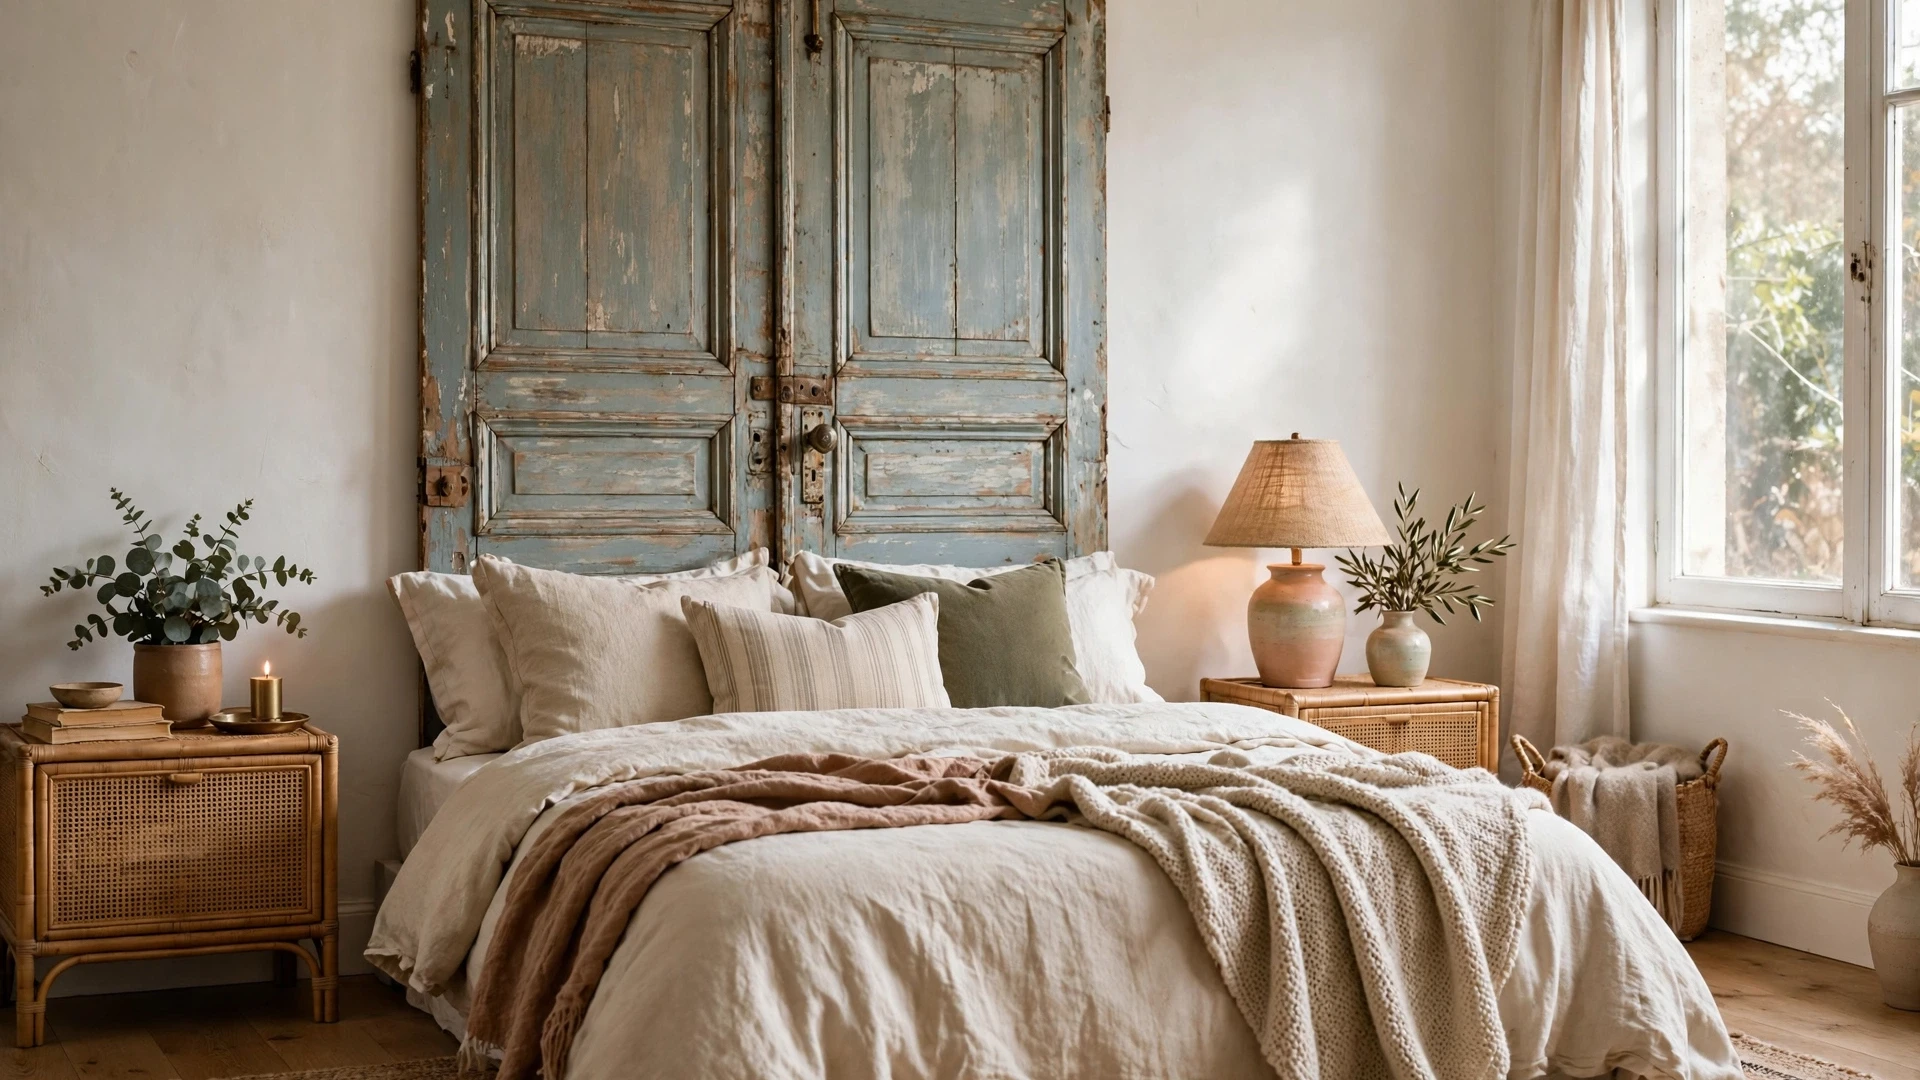
10. Upholstered Panel Trio
Three tall upholstered panels hung side by side create a tailored, high-end look that's secretly simple. Build three narrow panels instead of one wide one — each about 20 inches wide and 36 inches tall for a queen bed. Cover each panel with foam and fabric using the same staple-gun method as the single-panel headboard, but give each panel its own personality: the same fabric for a classic look, alternating solids and patterns for playfulness, or a gradient of three tones in the same color family for a designer ombré effect. Leave a one-inch gap between panels when you hang them with French cleats or heavy-duty picture hangers so each panel reads as its own piece. The vertical emphasis makes ceilings feel taller, which is a lovely trick in small bedrooms. This modular approach is also forgiving for beginners — wrapping a narrow panel is much easier to keep smooth than wrestling one giant piece of plywood.
11. Bamboo or Curtain Rod Canopy Headboard
For a dreamy, romantic feel on almost no budget, create a soft fabric canopy that acts as your headboard. Mount two curtain rod brackets on the wall above your bed — one near the ceiling and one about two feet below it — or install a single ceiling-mounted curtain track. Drape lightweight fabric (sheer curtains, a flat bedsheet, or a few yards of gauze from the fabric store) over the top rod and let it cascade down behind the bed, tucking the bottom behind the mattress. Pull the fabric slightly to one side and tie it loosely for an effortless, billowy look, or let it fall straight for a clean backdrop. White or ivory sheers keep things airy, while a warm blush or sage adds color. Fairy lights woven through the top of the drape turn it into the coziest reading nook at night. The whole project takes under an hour, requires no woodworking, and the fabric is washable — perfect if you like to refresh your room's look often.
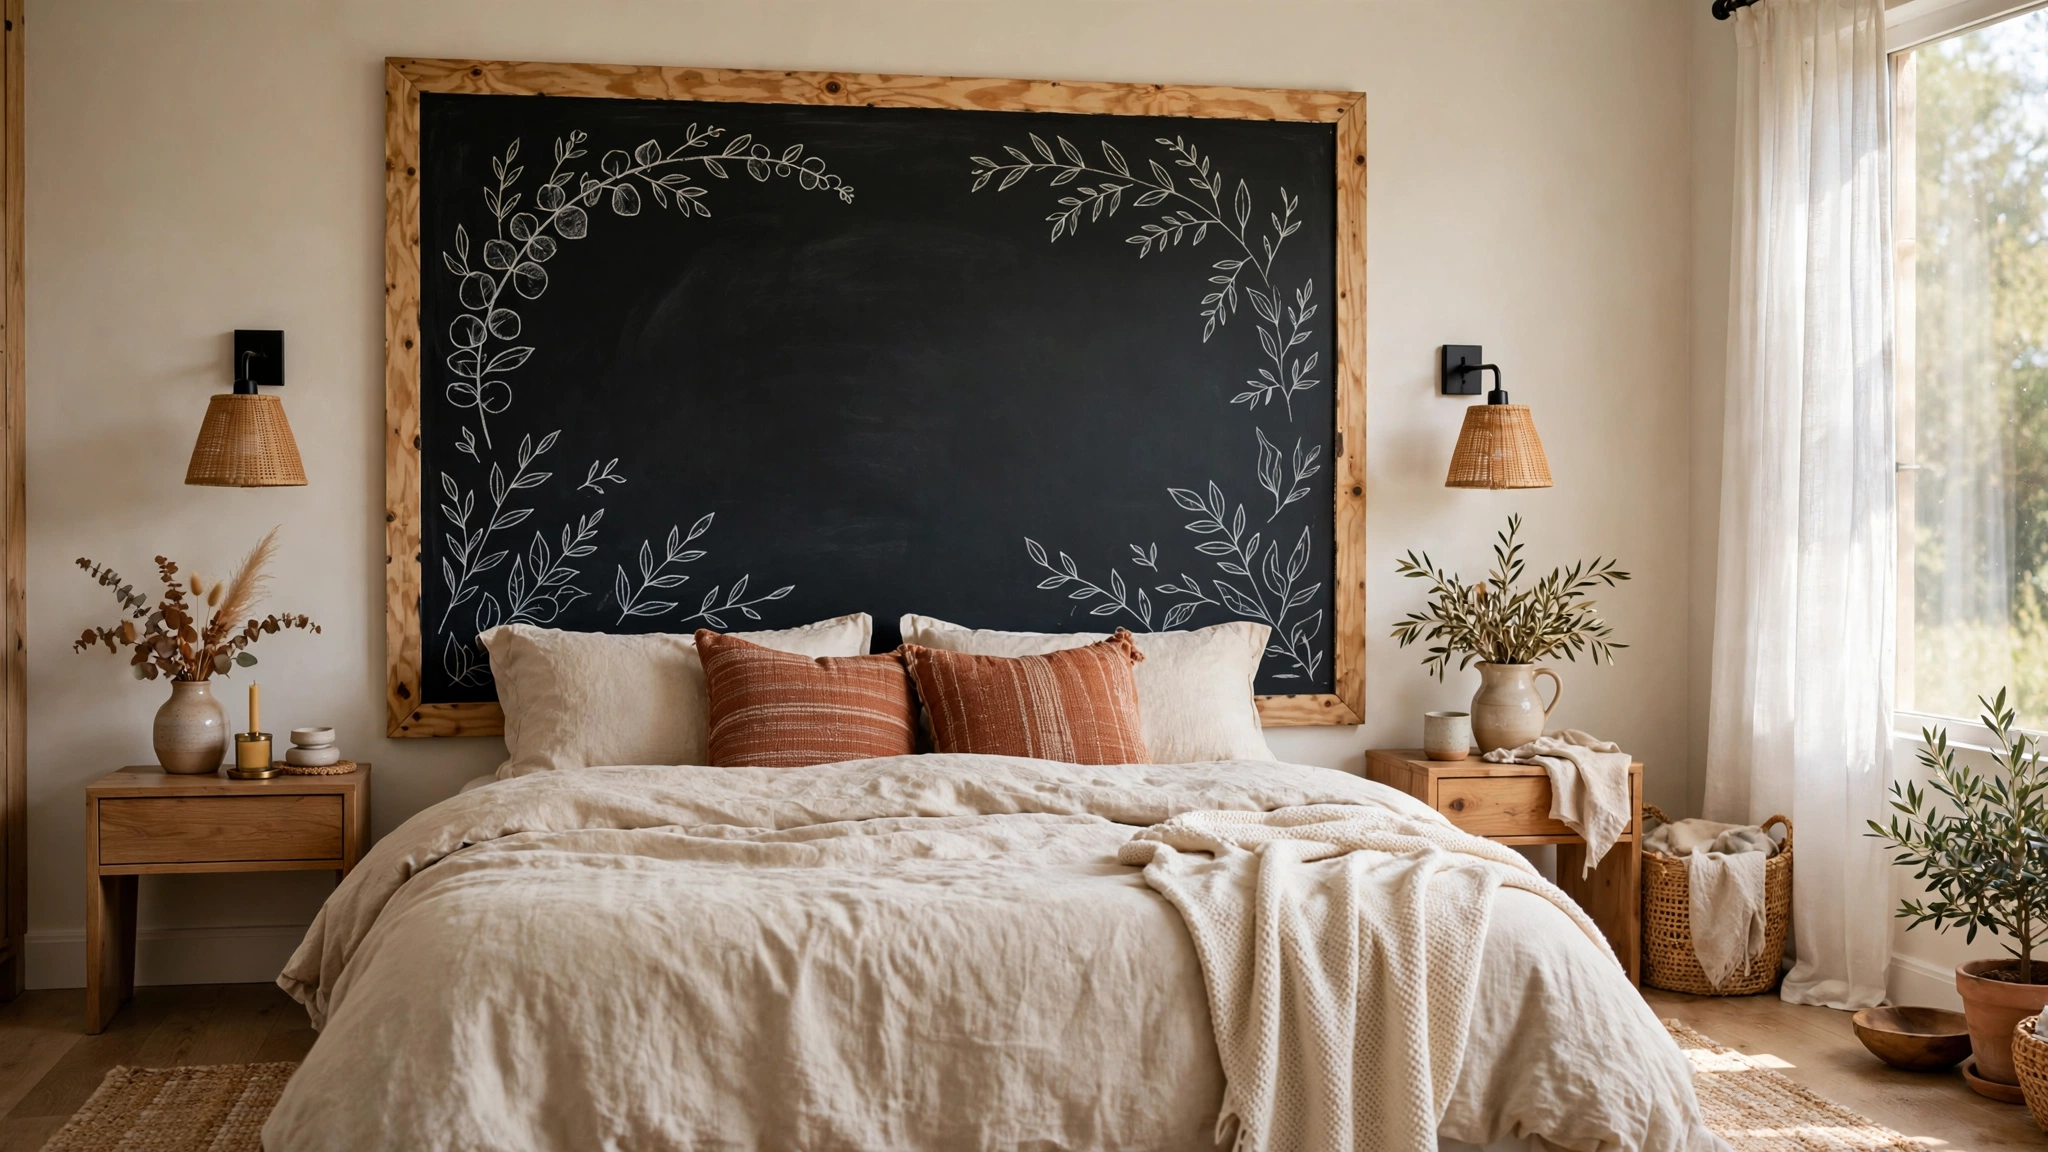
12. Chalkboard Paint Headboard
Part headboard, part ever-changing art project: a chalkboard headboard lets you redraw your bedroom's focal point whenever the mood strikes. Build a simple plywood panel sized to your bed, or paint a large rectangle directly on the wall — either way, apply two to three coats of chalkboard paint with a foam roller for a smooth finish, letting each coat dry fully. Before the first use, season the surface by rubbing the side of a piece of chalk over the entire area and wiping it off; this prevents ghosting from your first design. Then decorate: draw a botanical wreath, write an inspiring quote, sketch a geometric pattern, or map out the month's goals. Use chalk markers for crisp lines that last, or classic chalk for a soft look you can smudge and redo weekly. Frame the chalkboard area with thin wood trim for a finished look. It's playful, personal, and endlessly changeable — ideal for kids' rooms, creative types, and anyone who gets bored with static decor.
Styling Tips
Scale it right. Your headboard should be at least as wide as your mattress — wider looks intentional, narrower looks like a mistake. For height, aim for the top of the headboard to sit 24 to 36 inches above the mattress so pillows don't swallow it.
Layer your pillows. A headboard only looks its best with pillows styled against it. Start with sleeping pillows flat, add two to three Euro shams in front, then finish with one or two smaller accent pillows. Odd numbers look more relaxed; even numbers look more formal.
Mind the gap. If your headboard leans rather than mounts, push the bed snug against it so pillows don't slide into the crack. A small gap is fine for wall-mounted panels, since the pillows rest against the wall itself.
Light it well. A pair of wall sconces or plug-in pendant lights flanking the headboard draws the eye upward and makes the whole arrangement feel designed. Clip-on reading lights are a budget-friendly alternative that needs no wiring.
Repeat a material or color. Pull one element from your headboard into the rest of the room — the wood tone in a bench, the fabric color in curtains, the arch color in a throw pillow — so the headboard feels connected rather than random.
Keep bedding simple. A statement headboard pairs best with calm bedding. Let the headboard be the star and choose solid or subtly textured duvet covers and sheets.
FAQ
How much does a DIY headboard typically cost?
Most of the projects on this list cost between $20 and $80 in materials. Painted and fabric-drape versions are the cheapest (often under $25), while wood plank and upholstered panel builds run higher depending on lumber and fabric prices in your area. Shopping thrift stores and using leftover paint or fabric can bring costs down even further.
Can I make a headboard without power tools?
Absolutely. The macramé hanging, painted arch, fabric canopy, woven jute, and chalkboard-on-the-wall options need no power tools at all. For wood projects, most hardware stores will cut lumber to your measurements for free or a small fee, so you can often get by with just a drill or even hand tools.
How do I attach a DIY headboard safely?
Lightweight panels can hang on French cleats or heavy-duty picture hangers rated for the panel's weight. Heavier wood builds should be bolted directly to the bed frame or secured to wall studs with lag bolts — never rely on drywall anchors alone for a heavy headboard. If you simply lean a panel, make sure the bed frame holds it firmly in place so it can't tip.
Will a DIY headboard work in a rental?
Yes — choose damage-free options. Leaned panels, tension-rod fabric canopies, peel-and-stick shiplap, and anything hung on removable adhesive hooks leave no marks. Just avoid projects that require screwing into walls or the bed frame if your lease prohibits it.
What size should my headboard be?
Match the width to your mattress at minimum: about 38 inches for a twin, 54 for a full, 60 for a queen, and 76 for a king. Adding 2 to 6 extra inches on each side gives a more generous, designer look. Height is flexible, but most headboards sit 48 to 60 inches off the floor total.
How do I keep an upholstered headboard clean?
Vacuum it monthly with an upholstery attachment to remove dust, and spot-clean stains promptly with a damp cloth and mild soap — always test in a hidden spot first. Choosing a washable or stain-resistant fabric (like performance linen or outdoor canvas) makes life much easier, especially in kids' rooms or homes with pets.
A great bedroom doesn't require a big budget — just a little creativity and a free weekend. Any of these 12 DIY headboard ideas can transform a plain bed into the cozy centerpiece your room deserves, and each one leaves room for your own personal spin on colors, textures, and finishes. Pick the project that matches your skill level and style, gather your supplies, and enjoy the process. There's something deeply satisfying about resting your head each night against something you built yourself. Happy making!